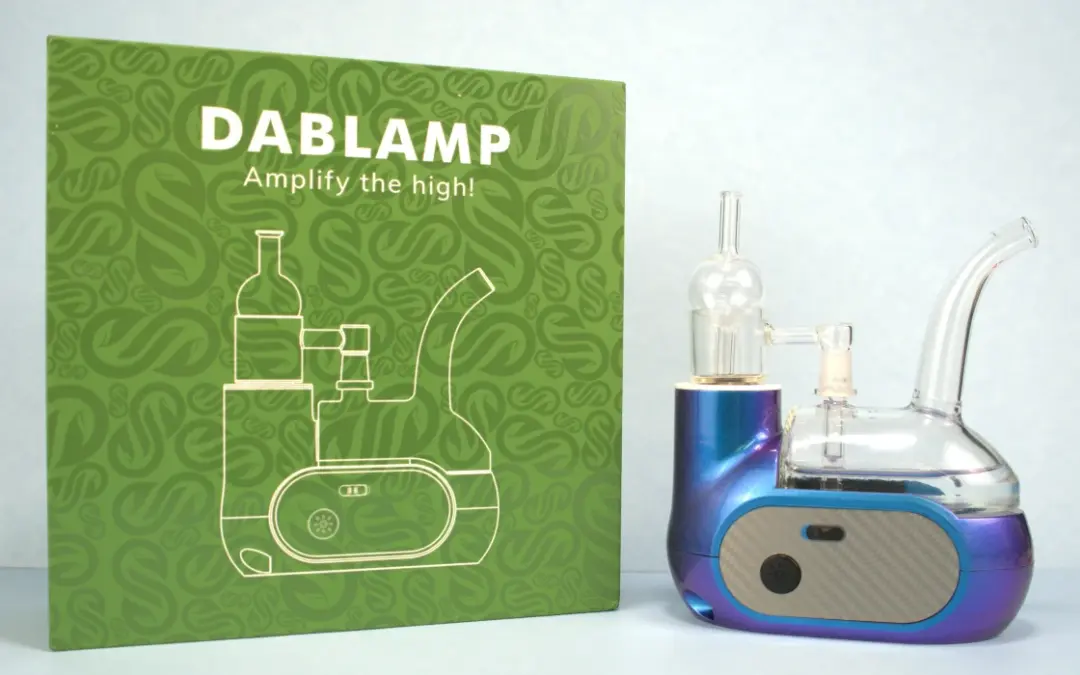
DabLamp Review
Contents
- 1 Is the Dablamp worth it?
- 2 Dablamp Specs + Ratings
- 3 Dablamp Key Features
- 4 What’s in the Dablamp kit?
- 5 Dablamp Induction Cup Heating System
- 6 Dablamp Vapor Quality
- 7 How was the ABV / Dab Extraction?
- 8 The Dablamp is best for Wax
- 9 Is the DabLamp portable?
- 10 Impressive Battery Life
- 11 Dablamp Learning Curve
- 12 Comparable to the Boost Evo
- 13 Dablamp Tips and Tricks
- 14 How to Clean the Dablamp
- 15 Dablamp Community Consensus
- 16 Dablamp Warranty
- 17 Dablamp Pros
- 18 Dablamp Cons
- 19 Who’s the Dablamp for?
- 20 Who’s it not for?
- 21 Conclusion
Is the Dablamp worth it?
If you’ve been thinking about upgrading to a unique but premium E-Rig, then the Dablamp might be right up your alley.
- Using a design similar to the Dr. Dabber Switch with a choice of buckets of quartz, titanium, or SiC, but is the simple user interface worth the $250 investment?
Read along as I go over the DabLamp’s key features and other tips and tricks I found along the way while reviewing this boat of a dab rig!
Dablamp Specs + Ratings
| Material Compatibility | Concentrates |
| Pass through charging | No |
| Swappable Battery | No |
| Charge Time | 4 hours |
| Charging Port | D/C Plug |
| Battery life | 30 Sessions / A week of normal use |
| Heating system | Quartz, titanium, SIC buckets |
| Heat up time | 3 Seconds~ |
| Temperature control | 3 Pre-Sets |
| Temperature Range | 450F-850F |
| Oven Size | Rice-Grain Sized Dabs |
| Vapor path way | Bucket Choice + Glass |
| Accessories | Dry Herb Chamber Available |
| Vibration Alert | Sound Alerts |
| Motion sensor | Overheating Protection |
| Warranty period | One Year on Electric Base |
| Price | $250 USD |
| Coupon Code | |
| Ease of Use | 8/10 |
| Vapor Quality | 8/10 |
| Manufacturing Quality | 8/10 |
| Ease of Cleaning | 8/10 |
| Portability | 8/10 |
| Durability | 8/10 |
Dablamp Key Features
- Massive 4200mAh battery
- 3 Pre-Set temperatures
- Directional Glass Carb Cap
- Large stay-at-home design
What’s in the Dablamp kit?
1x Dablamp Induction Dab Rig Base
1x Glass Attachment
1x Banger/Induction Cup Attachment
1x Titanium Induction Cup
1x Quartz Insert
1x SIC Insert
1x 3.5mm DC Charging Cable
1x Bubble Carp Cap (30mm)
1x Dab Tool
1x Carrying Case

Dablamp Induction Cup Heating System
You’ll have three choices of buckets to put into the glass base, including:
- Quartz insert
- Titanium Cup
- SiC insert

Quartz insert in the titanium bucket to be dropped into the glass banger
One thing to know is that the automatic heating modes will run between 650 Fahrenheit all the way to 800 Fahrenheit.
The instructions to change the temperatures are pretty confusing, so I’d just suggest sticking to the standard green temperature for most users. To run a cycle on the standard automatic setting, slide the unit power button on, and then press the big button after two seconds to begin the cycle.

The connector piece (right) is fragile
Something that surprised me immediately was how fast the DabLamp produced thick and milky vapor. I had loaded in a rice-sized grain of dab and panicked when I saw the stream of almost smoke running through the chamber. So much so that I forgot the commands to stop the session and instead pulled the glass connector piece out and pull out the bucket.
I ended up dropping the glass connector and it shattered, so yea, thanks to Bear from DabLamp for sending out a replacement so that I could actually test his E-Rig.
Don’t make my mistake: Know the command to stop an automatic heating session is two taps of the B button.

Another thing to know is that the automatic heat setting you’re on correlates to how long the bucket is heated for, and subsequently how long it will stay hot for. This comes down to these settings:
- Low (Blue LED – 25 seconds)
- Mid (Green LED – 35 seconds)
- High (Red LED – 40 seconds)
Green is the default temperature and does get a little hot, but if you want to change between them, you can cycle between the temperatures by double tapping the B button, and then pressing the B button once to select your temperature and begin a heating cycle.
Manual Heating Mode
- For manual heating, instead of pressing the big button after turning the DabLamp on, you’ll be pressing and holding it. The light will remain on to indicate that your bucket is being heated.
Overall, I found this to be the best way to hit the DabLamp as a light user because I don’t need over thirty seconds of hot white clouds hitting my face all at once.
I prefer one or two cloudy inhales and then I’m done for the next few hours. To cycle between the temperatures, it’s the same command of two B button clicks, and then pressing and holding once you’re on the right one.
Dablamp Vapor Quality
For vapor quality, I think people quitting dab torch rigs for E-Rigs will love the DabLamp.
Because of its almost pure glass vapor path, it’s a very clean air path and your dab will have no interaction with any kind of electronics that would otherwise affect the flavor. Especially compared to exposed coil dab pens, there is a big difference in flavor for the first few hits on the lamp before it gets really hot.

A pro that the DabLamp has going for it is the included SiC induction cup, which is somewhat similar to the one included in the Dr. Dabber Switch – The Switch SiC Induction Cup.
SiC is considered to be one of the best materials available on the market for dabbing as they allow for a slow heat transfer but then retains heat very well.
It’s a very smooth material and has an inert flavor like glass meaning it’s a good choice for Vaping Live Resins and Live Rosins. Still, though, I would say the Dablamp is better for veterans because the vapor can be quite hot and the glass chamber gets very hot, so you’ll have to be careful to not burn yourself.
Using the DabLamp in flower mode
- Included in new DabLamp models is a threaded metal bowl for ground flowers, which now makes it a great 2-in-1 E-Rig!

The metal bowl holds about 0.25g, and works with a threaded bowl lid and O-Rings to attach to its separate glass piece part which connects the bowl to the bubbler.

I found this feature to be a lot of fun as packing the threaded bowl was relaxing and reminded me of the good old bong-hitting days. I got a good amount of smoke/vapor from the blue temperature. There wasn’t too much flavor but it wasn’t harsh and it was fun!
How was the ABV / Dab Extraction?
The dab extraction is extremely powerful, and you might accidentally burn or chaz your buckets if you aren’t paying attention. Especially near the end of the green and red temperature, make sure you have that double click of the B button at the ready when you begin to notice any kind of burning in the chamber.

On high temperatures in automatic mode, you can expect to be coughing. For most of my sessions, I stuck to automatic mode but only heated the bowl for about five seconds at a time.
The Dablamp is best for Wax
I think that the DabLamp is better suited towards Vaping Wax and Shatter because they are overall better for melting and easier to clean than live resin and live rosin.
Especially if you prefer riding that thin line of harsh vapor, these concentrates are cheaper anyways and will give you the same effect without feeling like you’re missing out on the terpenes from your live resin.

Is the DabLamp portable?
The DabLamp isn’t portable because of all the moving glass parts to set it up.
One tip I’d suggest is to try and use it with a big vape case like the StashLogix Silverton. This will let you store all of the individual parts in separate areas just like the original packaging can, but in a better-looking kit with room for other things like your concentrates and Electric Dab Tools.

Impressive Battery Life
A good feature for heavy users is the over thirty solid sessions that the DabLamp can provide you with.
It uses an old-school D/C charging port which will take four hours to fully charge, but the 4200mAh battery will be consistently able to last over 50+ sessions.
- For heavy users, this means never having to worry about constantly charging your device.
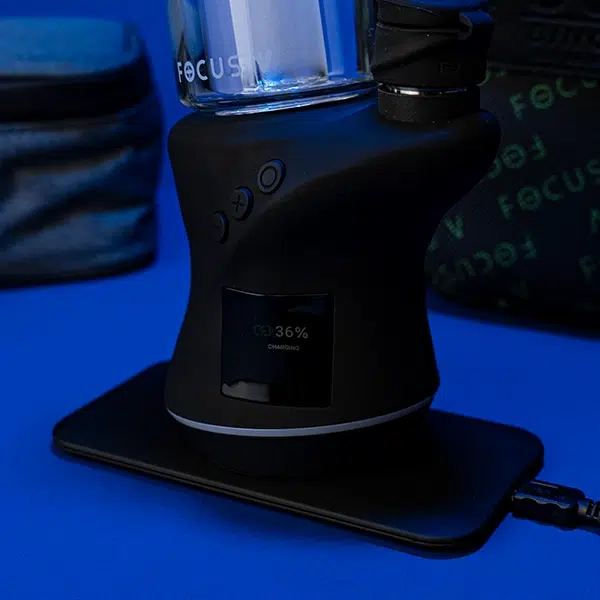
To compare this versus another modern device, the Focus V Carta Sport will last between 6-10 sessions but has USB-C and wireless charging. So, it just depends on what kind of battery specs you prefer.
Dablamp Learning Curve
- It’s my full-time job to know and understand all kinds of cannabis vaporizers but I have to admit that the DabLamp requires a bit of a learning curve.
I think that it’s something that they should work on improving. For example, if you leave the power supply on when you charge your device, you have a chance of ruining the device. The owner’s manual should also be written in better English so people can better understand it.
I don’t mind the big design because it does what it’s supposed to as a hard-hitting E-Rig, but if they made it slightly easier to use with commands that other E-Rigs use with one button use such as five clicks on, three clicks temperature, two for session mode, one for manual, it would be able to break into the Concentrate Vaporizer market much better and I can see it being more popular.
Comparable to the Boost Evo
As I’ve stated, it does kind of compete with the Dr. Dabber Switch, but it is also similar to the Dr. Dabber Boost Evo because of the quartz-to-glass vapor pathway and hard-hitting vapor.
The Boost Evo also runs at a very high temperature and runs the vapor directly to the bubbler thanks to a submerged design. If you don’t like one design or the other, it might be worth checking each one out.

Dablamp Tips and Tricks
- Clean the bowls with dry Q-Tips shortly after each use to minimize maintenance time
- Be very careful when handling the glass connections
- Clean the bowls and glass with some isopropyl before use
- Lighter users should stick to manual heating mode

How to Clean the Dablamp
To clean the DabLamp and all of its accessories, Vape Cleaning Wipes will be your best friend. In the instructions, it’s asked of you to clean everything before use which I assume is to help get rid of leftover manufacturing oils.

Since there are no electronics and everything is pretty solid, you’ll also be able to soak all removable parts in 99% isopropyl alcohol or Orange Chronic. Especially if you accidentally burn resin onto the inserts, you can soak them for a few hours before a gentle scraping with the included dab tool to bring them back to new.

Dablamp Community Consensus
The majority of users on FuckCombustion are liking the DabLamp. Again, these are experienced cannabis vaporizer users, so consider that.

Dablamp Warranty
You’ll have access to a one-year warranty on the battery base, but nothing on the accidental breaking of the glass.
Something to know here includes:
- Attempting pass-through charging will fry the device
- Follow the instructional pamphlet included in the kit about how to handle the glass properly
Dablamp Pros
- Great for hardcore dabbers that have an understanding of dabbing or want an E-Rig with a good glass air path
- Now included dry herb pod
- Very unique design E-Rig
- Solid manufacturing quality
- Directional airflow carb cap
- Big battery life
Dablamp Cons
- Required a moderate level of hand-eye coordination
- A lot of moving parts
- Not beginner friendly
- Instructions manual needs rewriting by an English native speaker
Who’s the Dablamp for?
I think that the Dablamp might seriously be the best option for hardcore dabbing users on the market. What it lacks in the user interface, it more than makes up for in terms of outright performance. It comes in at about $220-$250 USD, but I believe all of the accessories help to justify that price.
Who’s it not for?
It’s not an E-Rig for beginners. Honestly, one of the best E-Rigs for beginners right now is the Utillian 8. It got a lot of flak from Qewpins in his recent video but I’m not exactly sure why. To operate it, all you have to do is press and hold the power button and it will take care of everything else regarding the session.

Conclusion
There you have it folks, my thoughts on this beast of an E-Rig.
- It might be a bit clunky, but the high-quality accessories make it note-worthy for experienced dabbers that are looking for a similar feeling and temperature to torched quartz bangers.
It’s able to pump out massive clouds and maintenance is easy, but beginners or people who prefer live resins will be better off with different options.
If you want to read about how it stacks up to top brands, be sure to check out our list of the Best E Rigs on the market!
If you want something a bit easier to manage but also includes an integrated bubbler, you might consider also the Pulsar Sipper.
About Author

Kush is a writer and vaporizer expert at Tools420. He shares easy-to-understand guides and reviews on the latest gadgets and vape gear. When he’s not testing new devices, he enjoys hiking and keeping up with the newest tech.